Home Tree Atlas

Bathroom Shower Lighting Ideas

Bathroom Shower Lighting Ideas

Is there any real need to have lighting just for the showering area? Or will the normal ceiling light in the bathroom do? Well, it depends on how much comfort, relaxation, and convenience you want in the shower.

One light fitted in the middle of the bathroom isn’t good enough. I believe yes, you need shower lighting. So take a look at these bathroom shower lighting ideas for different ways of adding some light.

All Hidden Away

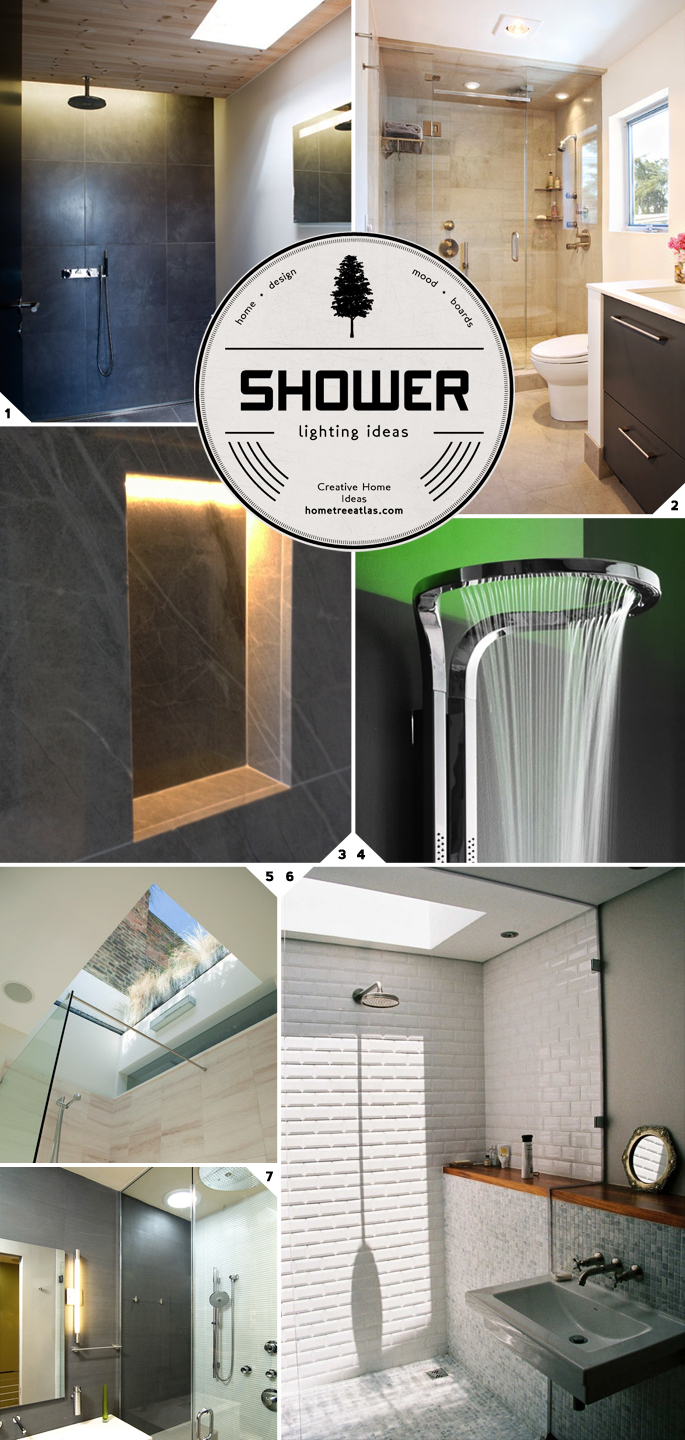
The go to choice would be to install recessed lights above the shower as seen in picture (2). The good thing about recessed shower lighting is that everything is hidden away in the ceiling, creating a sleek and modern look.

Another option for adding lighting in the shower is to have a recessed shelf built into the wall. This way you’ll have a place to keep all of your shampoos and soaps, but at the same time the shelf can have a recessed light fitted into the top of the cutaway – adding light to the shower area (3).

Going Fancy

For something a little more dynamic, have a look at shower heads that have LED lights in them. You can get pretty basic ones, or there are more luxurious ones that shine light around the shower – just like in picture (4).

Bringing In Daylight 

A great way to add in shower lighting, at least in the day time, is to use natural lighting. Windows work great. If you plan on fitting some in, avoid having large ones as you’ll feel as if you are on display. Smaller ones are the way to go, with frosted glass.

Or to bring in even more daylight, take a look at the showers with skylights in pictures (5) and (6). The great thing about skylights is that they bring in a lot of light and keep your privacy at the same time. An alternative would be to fit solar tubes. These are tubes that go from outside of the roof, down into the shower – bringing in daylight just like in picture (7). You can find versions that have a ring light in them so they can also be turned on at night.

Safety and Choice of Light Fixtures

When you are shopping for shower lighting fixtures you want to make sure they are approved for being used in such a damp and wet area. Even if they are being used in the ceiling. All of the mist and condensation works it way up there. So check carefully when buying. 1/2/3/4/5/6/7

Related Posts:

December 20, 2013 in Bathroom, Lighting

Leave No Space Dark: Hallway Lighting Ideas

Hallway Lighting Ideas

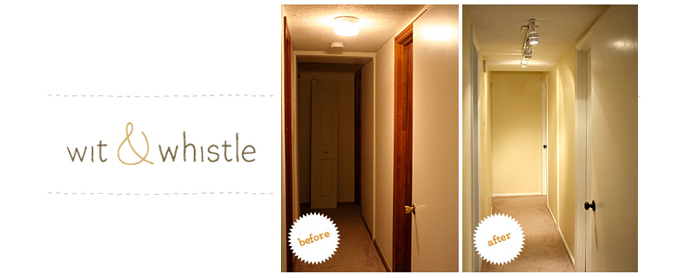
Let’s not forget to light up the hallways in our homes. You’ll want to have at least one light every 5-10 feet so there are no dark spots. One light in the middle of the hallway won’t cut it. Just take a look at the picture below from Wit and Whistle and you’ll see why.

Hallway Lighting

So here are all of the hallway lighting ideas you’ll need to brighten up your hallways.

The Modern Look

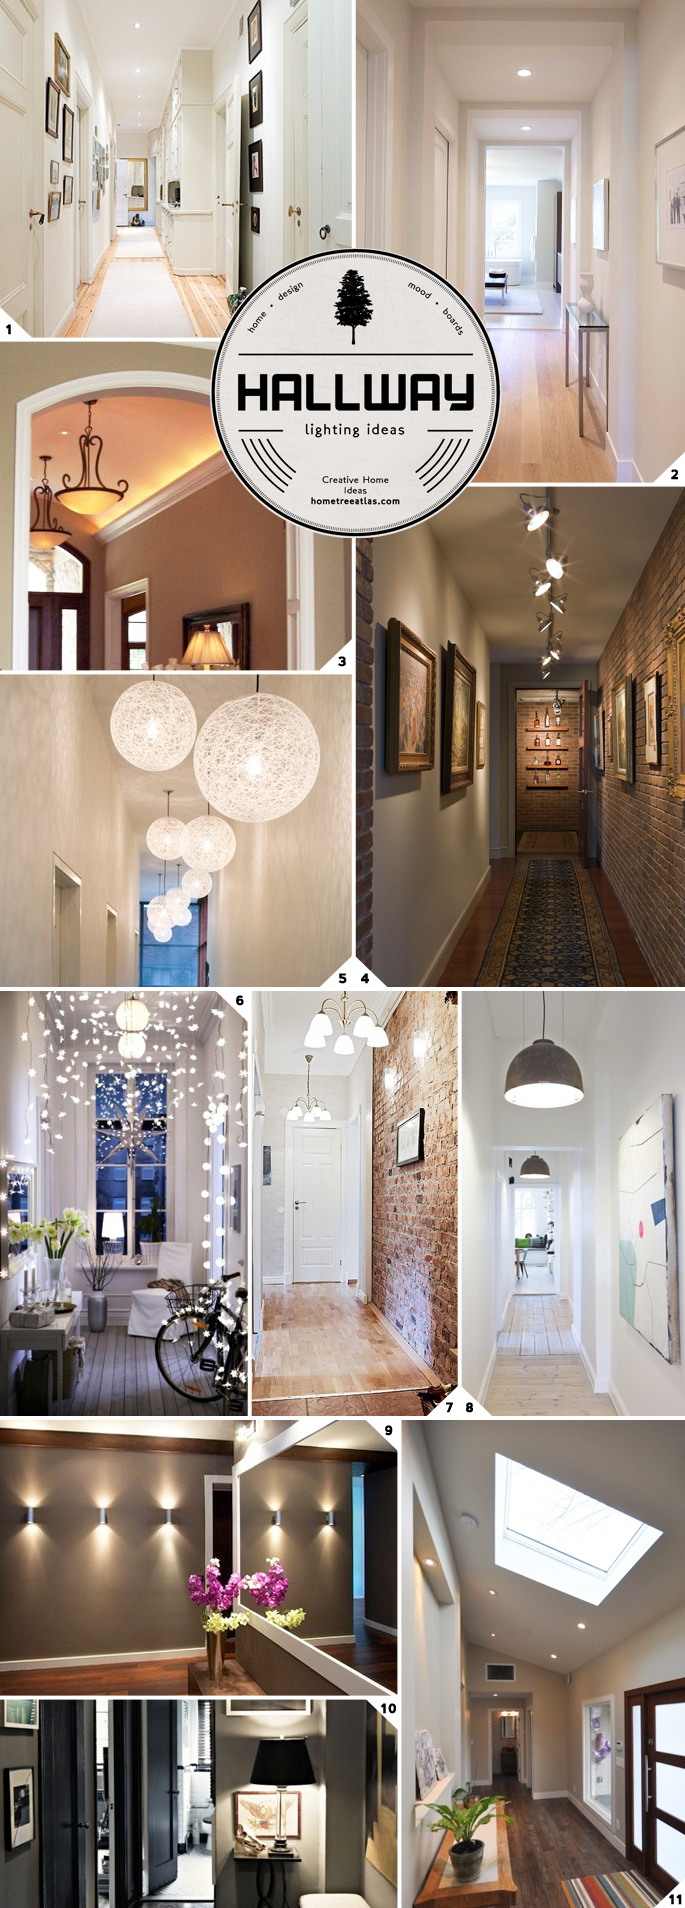
For a modern looking hallway design, go with recessed lighting – just like in pictures (1) and (2). These lights are fitted into the ceiling, so all of the fixtures are hidden away creating a sleek minimalist, and modern look. They will also make your hallway feel taller. Recessed lights can be used along side other lighting fixtures too – like pendant lights, wall lights, cove lighting design, or side table lighting if you want to create different lighting effects in the space, for a grander look.

There are also down lights or recessed spotlights which are similar to recessed lights. Except these are fitted closer to the walls, to light up a walls texture, or paintings hanging on them.

Hallway Lights

Something Fancy

Cove lighting can line a hallway’s ceiling and add a nice soft glow to the room. Cove lighting is when lights are hidden away, but softly bounce light off of the walls and ceiling back into the room (3). There are two ways to do this A) have a drop down ceiling fitted and a cutaway where the lights can sit. Or B) fit crown molding a few inches below the ceiling so there is space for lights to sit on top – you can read more about it and see more pictures in my post here (The Beauty of Using Cove Lighting: Ideas and Designs).

Lighting Your Way

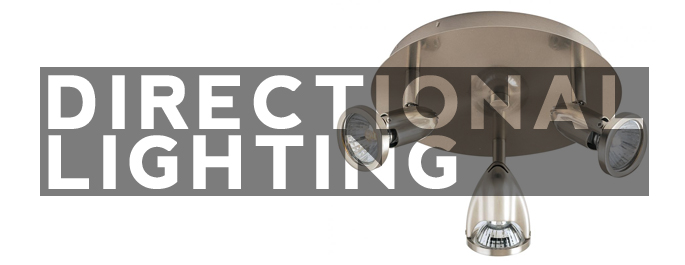
Directional spotlights and track lighting are lights that can be pointed to different areas of the hallway. If you have a long hallway use track lighting (4). If you have more of a box shaped hallway look for directional spotlights which are usually 3 lights grouped closely together in a circle (seen in the picture below). The good thing about these kinds of light fixtures is that you only need one electrical outlet to install a number of lights.

Directional Lighting

Bringing The Light Down

If you are lucky enough to have a tall hallway, you’ll want to use lights that bring the light closer down. So use hanging lights like pendants (5) (6) (7) (8), mini chandeliers, or lanterns.

Wall Lighting

If you have a wide hallway, then you have the option of using wall lights – as seen in picture (9). You could also hang up gallery lights above any paintings.

Another option for wide hallways is to add a side table just like in picture (10). This side table can be used to display decor items, have a clutter tray, and have a lamp on it – adding to the lighting in the hallway.

Designer Tip: If you want to make your hallway feel larger and wider, hang up a mirror. 

Going Natural

For the hallways on the top floor, look to use natural lighting. One way to do this is to fit solar tubes. These are tubes that go all the way from the roof to inside the house, bringing light down. You can even find solar tubes that have a ring light around them so you can turn them on at night. Or how about fitting a skylight (11) for some majestic hall lighting? 1/2/3/4/5/6/7/8/9/10/11

More hallway mood board posts:

Related Posts:


December 19, 2013 in Lighting

Starting a Blog

Have you been wanting to start your own blog?

There are a lot of steps when it comes to setting up your own blog. And when you you do finally get everything up online, it isn’t the best of looking sites.

After helping a lot of people set up and design their blogs, I’m starting a blog branding service. Here is the low down..

Blogging Service

Demo Site

Blog Headers

The introductory rate for all of this $50

For a limited time


I would like to send out many MANY thanks to Jacob. If you are thinking about setting a blog up and have no idea where to start–go to him! He is a wonderful man who really pushed me to dig deep. He not only helped me develop my blog name but how to set the entire blog up too. God love him. He is so incredibly helpful. thank you, thank you, thank you Jacob you are such a dear. – Joelle

If you have any questions you can email me at jacob [at] hometreeatlas.com or through the contact page

December 19, 2013 in Blogging

Home Decor Ideas: Using Your Printer

Home Decor Ideas Using a Printer

There are a lot of amazing home decor projects you can do with your printer. You’ve got everything from different kinds of DIY transfer papers to printables, and plotter prints. You can get really crafty, or there are ideas that just require you to hit the ‘print’ button

Transfer Magic

Transferring onto wood is a great home decor piece to have. Black and white photos look best on raw wood. For this though you’ll need a Lazerjet printer, or find someone who does. You can find the directions to making the black and white wooden photo in picture (1) here. A white backdrop works best if you want to do a color transfer – just check out the bench in picture (2) from Poppy Talk.

Or how about transferring your photos onto ceramic tiles to create your own homemade coasters (3) – follow along with the instructions here.

You’ve also got fabric transfer printing paper – which is what was used to transfer the bee image onto the napkin (4). Check out Sophia’s Decor to see the other transfers she has done – like transferring vintage graphics onto chairs and tote bags.

Water slide decal paper was used to transfer a free printable onto a flower pot – seen in picture (5) from Lost Bird Studio.

Lumi sun print paints are the the latest thing in photo transferring. What you do: print out a negative image on a transparent sheet (which you can do at home with an Inkjet printer), then you coat your fabric (or other material) with the Lumi Inkodye, place the negative image on top of it and leave it out in the sun. The negative image blocks out the sun, which exposes the image – just like the DIY canvas print in picture (6).

The Gift of The Internet – Printable Ideas

The internet is a true friend when it comes to free printables. You can get everything from artwork and hand lettered quotes, to labels for jars, notebooks and gifts.

Over at Tried and True you can download the outline artwork of the quote from picture (7) and paint it in. Then there are the free antique labels that Cathe over at Just Something I Made has put up for free download. She used the labels to create her own hand towel labels (8) – awesome!

Feel like doing a little origami? Mr Printables has printable templates for creating your own display letters (9).

Plain Printing

Here are some ideas that just require good old fashion printing. First is a confetti sheet of travel photos I created and printed out on glossy paper (10). Check the how to guide here: Travel Photos Confetti Display – Plus DIY Printables Guide.

This next DIY project is an easy one, and cheap. But you will need to go out to a printer like Kinkos or Staples. Ask for Blueprint/Plotter/Engineer prints and you will get some huge black and white pieces for around $5++ just like the one in picture (11) by A Beautiful Mess.

Why not print out your photos, like I did with my travel photos, and create your own little stands. I used air dry clay to make the stands in picture (12) – which you can find the instructions to here.

Related Posts:


Related Posts Plugin for WordPress, Blogger...
December 19, 2013 in Decor, DIY