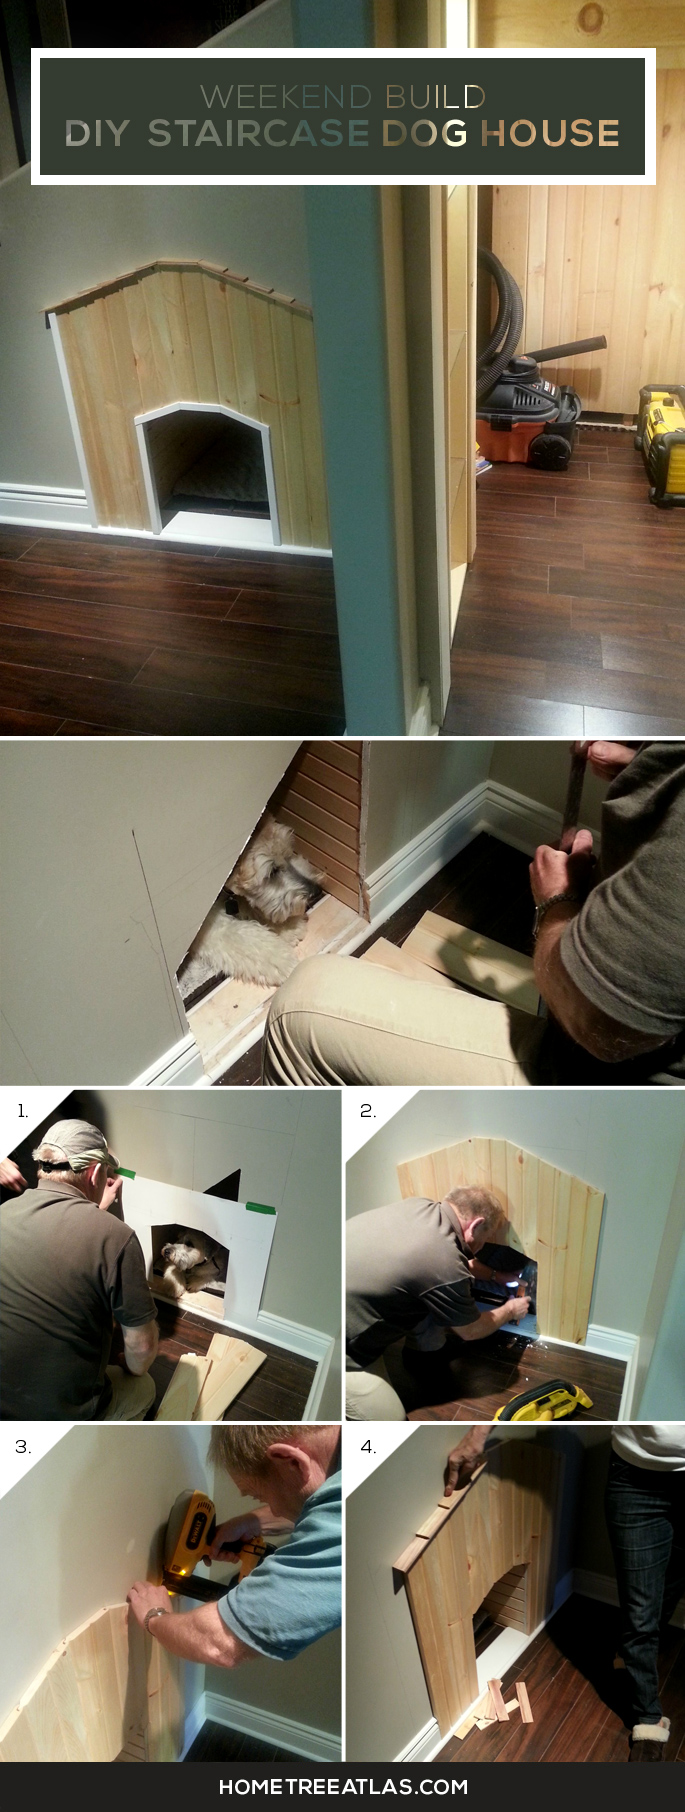
There are a lot of ways you can go about creating a DIY dog bed, from using an old tire or even an old crib (Making Sleeping Arrangements: Creative Ideas for DIY Dog Beds). But why not save some space and go with a built in dog house.
Kay and her father share with Home Tree Atlas how they built, in 2 days, a DIY dog house under the stairs in her Toronto home.
TOOLS
- Nail Gun
A hammer and nails could also work, but a nail gun will make it much easier
- Jigsaw/Drywall Saw
You’ll need a saw to cut the hole (we used a jigsaw but you can also use a drywall saw) and to cut the wooden boards to size.
MATERIALS
The amount of materials you need will depend on the size of your dog, and how big of a dog house you’ll be building.
- Pine Tongue And Groove Boards
Enough to cover the inside and outside
- Wooden Shims
Used to make the shingles on the ‘roof’
- White L-shaped Trim
Any kind of trim could work here, but we have a lot of it and wanted to tie it in
INSTRUCTIONS
Step 1: Cutting the Hole
Use the stud finder and measure out the size of the hole you want to cut.

Step 2: The Interior
The interior of the dog house was fitted with tongue in groove pine boards using a nail gun.

Step 3: The Door
You want to make the entrance large enough for your dog to be able to fit through it easily – about the height that your dog haunches over. While on the inside you’d want it to be high enough for your dog to be able to stand up in.


Step 4: Nailing on the Outside
The pine boards were then nailed to create the outside of the dog house


Step 5: Shingles for the Roof
We used wooden shims since they were cheap and didn’t need to be cut. These were nail gunned to the pine boards.


Step 6: Adding the Trim
We took the white trim and added it to the edges of the outside to create a finished look.


Email me at jacob@hometreeatlas.com with photos if you make your own, or if you have any questions.













Comments are closed.